
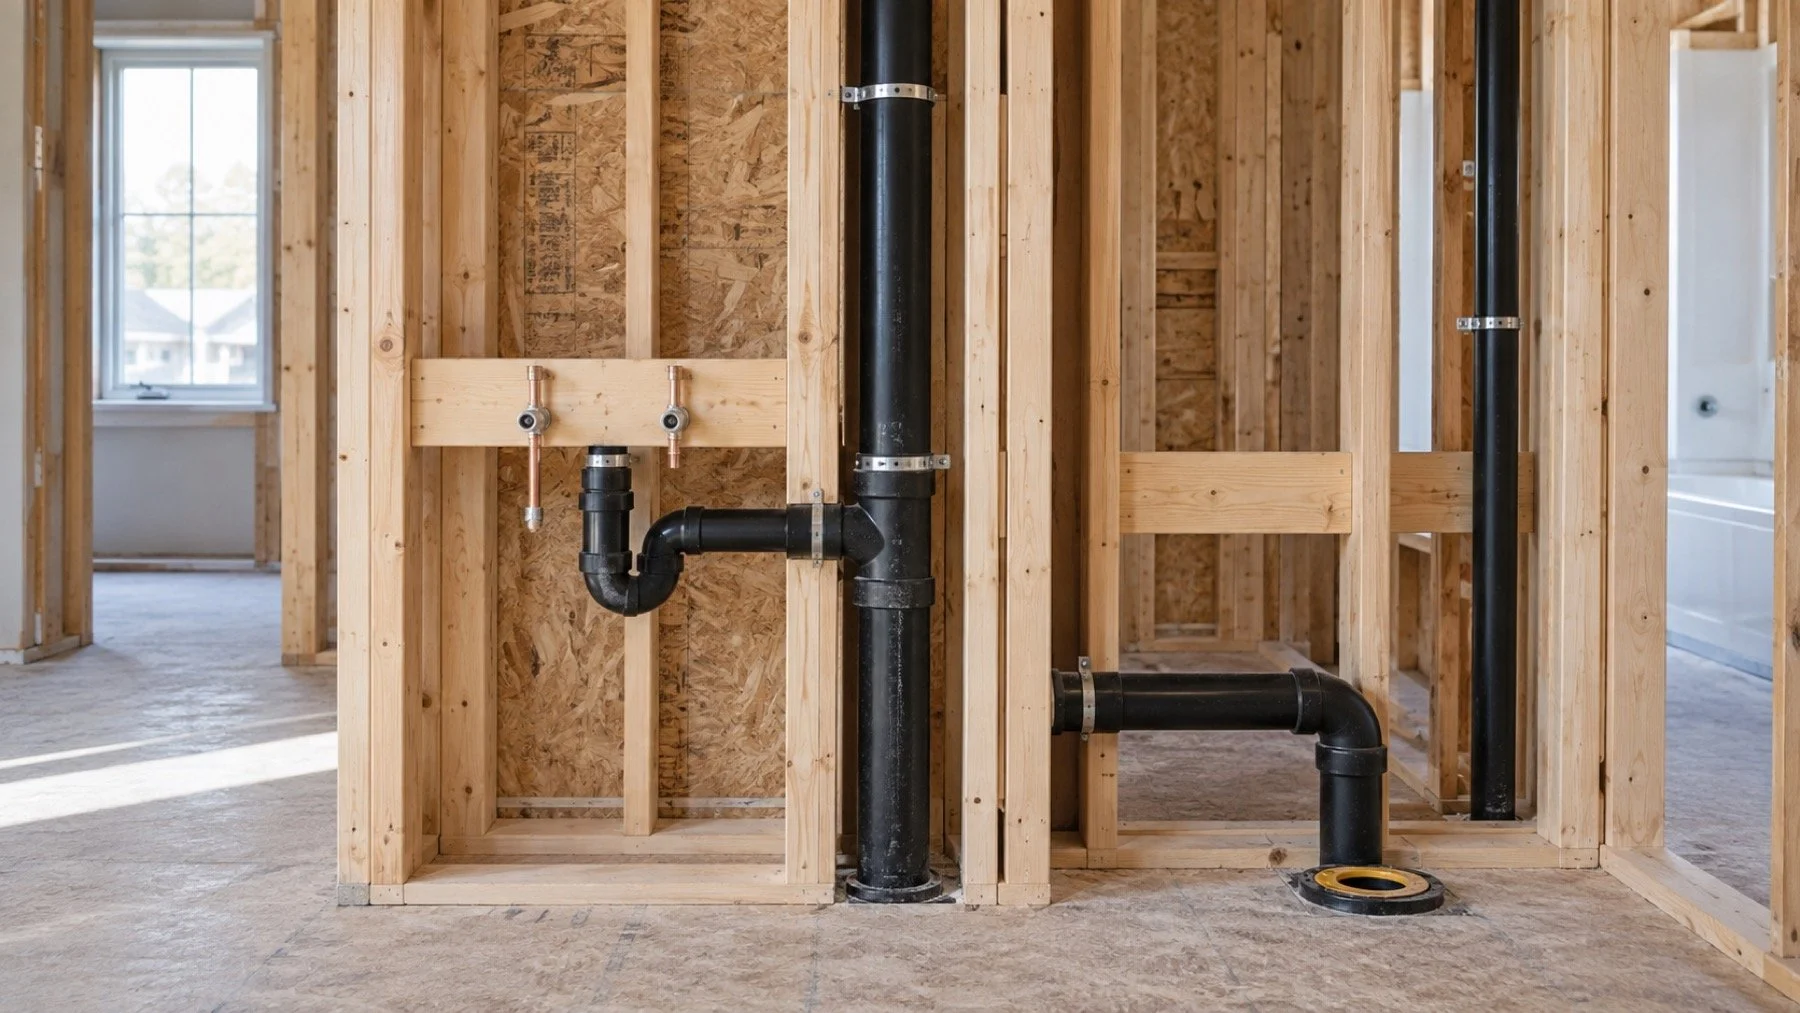
Two bathroom fixtures can sometimes share part of a venting path, but that does not mean any nearby drains can be tied together. Wet venting works only when the permitted fixtures, pipe sizes, connection order, and layout meet the Ontario Building Code.
We treat it as a designed drainage arrangement, not a shortcut. The pipe carries wastewater for one fixture while also protecting another trap from pressure changes. A wrong connection can leave a trap exposed even when the drain appears to empty.
This direct answer explains the concept without substituting for the current code text, permit drawings, or an inspection.
Start with the trap seal that needs protection
Every trapped fixture needs a stable water seal to block sewer gas. Flowing water can create positive or negative pressure in the drainage system. Venting gives air a controlled path so the trap is less likely to siphon or blow out.
A wet vent shares that job with a drain segment. The segment still has to carry discharge, so its size, slope, and fixture connections matter more than the fact that fixtures sit close together.
Read the connection order, not only the drawing symbols
On a plan, two pipes can look connected without showing the vertical relationship, branch direction, or developed length clearly. In the field, a fitting rolled above or below the intended position can change how the arrangement works.
Review the isometric drawing and the framing route together. The plumber needs to know which fixture drains through the wet vent, which fixture receives the venting benefit, and where the dry vent continues.
Do not import rules from another code
Search results often show British Columbia, United States, or older code examples. Those diagrams may explain the idea, but they do not establish compliance for an Ontario project. Use the current Ontario regulation and the local building department for the applicable permit and inspection path.
The Ontario government provides the current Building Code resources and regulation. Exact pipe sizes or clause numbers should come from that verified text for the project, not from a generic illustration.
Coordinate wet venting before holes are drilled
Joists, beams, and fixture locations control the available route. Drainage needs grade, vents need continuity, and fittings need room. A late layout change can move a toilet, vanity, or wall if the intended arrangement no longer fits.
Set the fixture centres and finished floor elevations before rough in. Then confirm the fitting sequence, cleanout access, and test plan before the walls close.
Expect inspection to follow the installed arrangement
A code compliant idea on paper still has to match the work. Keep the approved drawing available, leave the piping visible for the required inspection, and avoid covering a change before it is reviewed.
If the layout changes, ask whether the permit drawing or inspection record needs to change. The municipal authority makes that decision.
Read the complete fixture arrangement
Follow air and water through the same pipe
Every trapped fixture needs protection against pressure changes that can pull water from the trap or force air through it. A dry vent carries air and is not intended to carry fixture discharge. In an approved wet vent arrangement, a section of drainage piping also provides the venting path for another fixture. That shared job is why pipe size, fixture order, connection location, and total arrangement matter together.
Think of the layout as a route, not as a label on one fitting. Water from the wet vented fixture has to pass without blocking the air path needed by the other trap. A drawing that omits pipe size, grade, connection direction, or the fixtures served cannot prove the arrangement works. The plumber and permit reviewer need the complete group.
An image from another province or an older code edition can explain the concept and still be wrong for a current Ontario project. Ontario brought the 2024 Building Code into effect on January 1, 2025. Confirm the code and transition rules that apply to the permit, then use the actual project drawing rather than copying a generic internet diagram.
Let fixture locations expose the real constraint
In a bathroom group, moving the lavatory can change the vent route even when the toilet and shower stay put. Moving the toilet can change branch length and connection order. Raising a floor can affect grade and flange elevation. The arrangement should be reviewed after the fixture selections and finished wall faces are known, not while the room is still a rough rectangle.
Basement bathrooms add existing concrete, limited ceiling height, foundation walls, and a fixed building drain to the problem. An ensuite can add beams, open ceilings below, and wall mounted fixtures. These conditions do not make wet venting impossible. They make early layout more valuable because each available route has consequences for structure and finishes.
Bring fixture specification sheets to the rough in review. A standard drawing symbol may hide a carrier, offset outlet, deep shower base, or cabinet that changes where piping can pass. The plumber can then coordinate the legal venting arrangement with the physical product instead of discovering the conflict after framing or concrete work.
Inspect what will soon be hidden
Before closure, check that the installed pipe sizes, fittings, grade, supports, cleanouts, and fixture connections match the approved arrangement. Leave the work visible for the required inspection. If a site condition forces a change, update the responsible designer or permit record as required rather than treating the field adjustment as an invisible substitute for the drawing.
Photograph the complete group from several angles. Include measurements from studs and the finished floor reference. A close view of one fitting does not show the vent path. The useful record lets a future plumber trace which fixture drains through which branch and where the dry vent continues above the flood level of the connected fixtures.
Wet venting can reduce separate piping when the permitted conditions are met. It is not a shortcut around venting. For a renovation, send Seal Plumbing the floor plan, fixture schedule, framing photos, and the location of the existing drain and vent. That gives the team enough context to discuss a workable rough in before finishes remove the options.
Questions that expose an incomplete wet vent plan
Ask which fixture provides the venting path, which fixtures are wet vented, where the dry vent begins, and what pipe sizes and slopes are shown. Ask whether the arrangement changes after a branch turns, joins another group, or passes through the floor. If the answer depends on a coloured line with no dimensions or connection details, the drawing needs more information.
Next, compare the drawing with the actual framing and fixture data. Confirm trap arm routes, wall thickness, joist direction, toilet outlet, shower drain, lavatory cabinet, and finished floor height. A diagram can be valid in principle but impossible to install in the available cavity without changing the permitted order or length.
Finally, ask who will resolve field changes and how the permit record will be updated when required. The plumber can identify the conflict, but the responsible designer and building authority may need to review the change. Keeping that path clear protects the inspection and avoids covering a venting arrangement that no longer matches the accepted plan.
What to send for a layout review
Provide a dimensioned floor plan, fixture specifications, finished wall and floor information, joist direction, photos of open framing, and the locations of the existing building drain and vent. Mark any beams, low ceilings, foundation walls, or rooms below where piping cannot be exposed. These constraints help the plumber test a real route instead of discussing wet venting only in theory.
If a permit has been issued, include the accepted plumbing drawing and inspection notes. If the layout has changed, identify every moved fixture. Seal Plumbing can review the plumbing arrangement and installation scope, while the building authority retains the final decision on the permitted work.
Verify the fixture group as one arrangement
The value of wet venting is efficient use of an approved drainage arrangement. Its risk is treating a concept as permission for any compact layout. Verify the complete fixture group, current Ontario requirements, and installed route together. No single fitting or diagram can carry that decision alone.
For homeowners comparing proposals, ask each contractor to mark the wet vent path on the same floor plan. The explanation should name the fixtures served, the dry vent continuation, and any layout condition that would force a different design. Comparing marked routes is more useful than comparing a line item that says venting. It shows whether the contractor has accounted for the existing drain, framing, ceiling below, and selected fixtures. It also gives the permit discussion a concrete drawing instead of a verbal assumption.
Review wet venting with the bathroom layout
Bathroom layout, fixture choices, and permit planning all shape the venting route.
The 2024 edition of Ontario’s Building Code took effect January 1, 2025. A wet vent layout for a current permit has to use the applicable edition and transition rules. Ontario Building Code overview.
Code aware next step for a shared vent layout
Send the floor plan, fixture centres, framing information, and any approved permit drawings. Seal Plumbing can review the plumbing arrangement for the actual GTA project.