
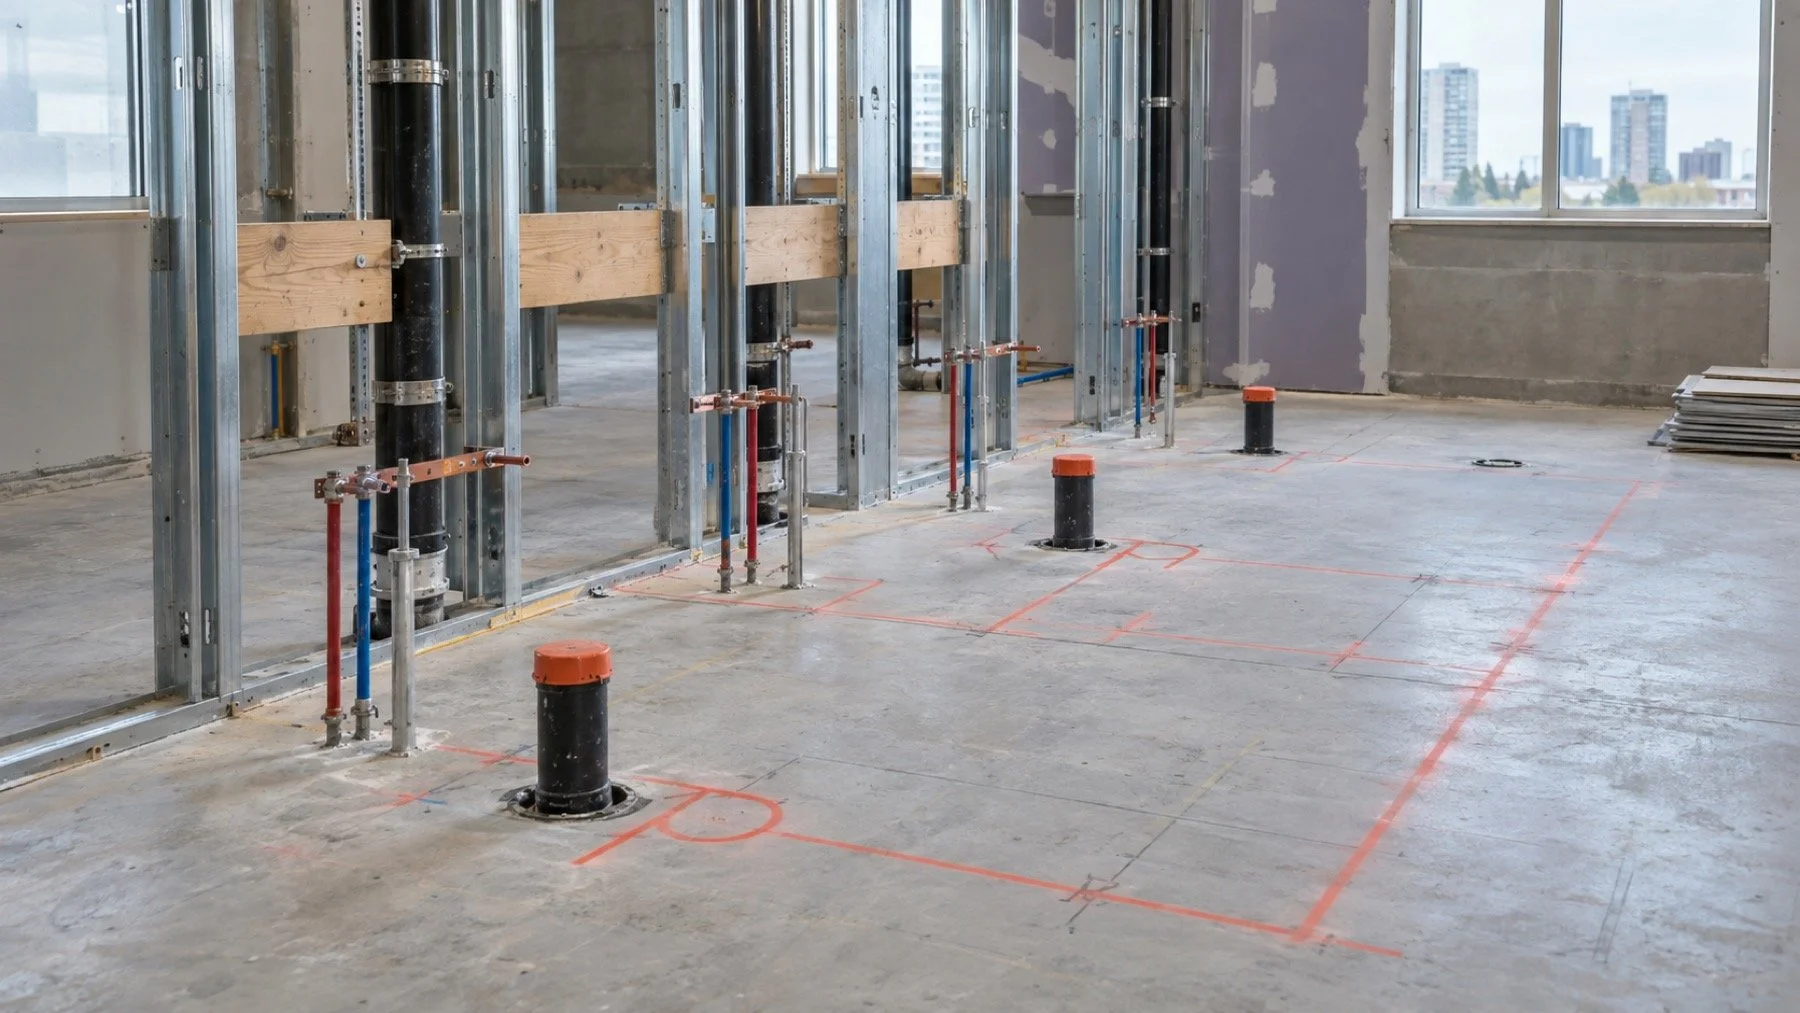
A wider washroom is not automatically a barrier free washroom. Accessibility depends on the clear route, turning and transfer space, approach to fixtures, mounting heights, door operation, accessories, and the exact building classification.
We need those clearances before the plumbing rough in is fixed. Moving a toilet drain or lavatory supplies after walls, waterproofing, and tile are complete is expensive and may still leave the room noncompliant.
This myth correction explains how the fit out team should coordinate plumbing without presenting Seal Plumbing as the project accessibility consultant or code certifier.
Myth: room width proves accessibility
Overall width says little about what remains after the door swings, partitions, grab bars, dispensers, counters, and fixtures are installed. The designer must test the complete clear floor spaces and paths using the current Ontario requirements for the project.
Do not scale a marketing floor plan. Use dimensioned permit drawings and the latest approved revisions.
Myth: the toilet can move during finishing
The toilet drain, water supply, carrier or flange, wall reinforcement, and grab bar zones interact. A small shift can change transfer space or put an accessory into a required approach. Set the finished wall faces and floor build up before locating the rough in.
Coordinate in wall supports with plumbing so fasteners and pipes do not compete for the same space.
Myth: a standard lavatory only needs a lower counter
The basin, rim, trap, supplies, insulation or protective covers, knee space, faucet controls, mirror, and accessories form one usable station. A compliant height does not help if piping or cabinetry blocks the approach.
Select the fixture and mounting method before rough in. The product dimensions must agree with the accessibility layout.
Myth: code review belongs to the plumber alone
The architect or qualified designer, permit authority, accessibility requirements, product supplier, general contractor, and trades each hold part of the information. Seal Plumbing can install the plumbing scope and review drawings as described on its commercial service page, but it does not advertise accessibility certification or permit drawing services.
Name the person responsible for the final code matrix and field coordination. Record changes through the project process instead of relying on a verbal site adjustment.
Hold the clearances through the final fit out
A room can pass rough in coordination and lose usability when partitions, garbage bins, shelves, door hardware, or dispensers are added. Review the final fixture and accessory shop drawings against the approved plan.
Before turnover, inspect the installed approach, controls, clearances, and access panels. The authority and project consultant determine compliance.
Coordinate the clearances through construction
Set fixture centres from the accessible route
Begin with the entrance, door operation, clear path, turning space, transfer area, and the approach each fixture requires under the project rules. Then place the toilet, lavatory, accessories, and partitions. If plumbing centres are set first, the designer may be forced to protect a pipe location at the expense of usable clear space.
Dimension from finished surfaces, not unfinished studs. Tile, wall protection, backing, and partitions all change the final face. The toilet outlet and supply, lavatory drain and supplies, and any carrier must match those finished dimensions. A rough in that is only a small distance off can affect grab bar reach or the clear approach beside a fixture.
Use the current approved drawings and fixture schedule. Barrier free requirements depend on the building, occupancy, project scope, and applicable code. Do not import a detail from another province or a different building type because it looks similar. Name the designer or consultant responsible for the final accessibility interpretation.
Coordinate what sits inside the wall
Grab bars and other supports need backing or an approved support system. Carriers, vent piping, water lines, flush valves, electrical work, and accessories can compete for the same stud cavity. A coordinated wall elevation should show more than the visible fixture. It should show supports, service access, control locations, and prohibited drilling zones.
The lavatory needs usable knee and toe space as required by the design. Traps, supplies, valves, insulation or protective covers, counters, and cabinetry all affect that space. Select the basin and faucet early enough for the plumber to place connections without creating a pipe obstacle where the approach has to remain clear.
Floor drains, cleanouts, and access panels also need deliberate locations. A cleanout hidden behind a fixed cabinet or a drain placed where it interrupts a required clear surface creates a maintenance problem. Review these service points during coordination rather than treating them as minor field choices after the main fixtures are located.
Hold the design through procurement and closeout
Substituted fixtures can change outlet positions, dimensions, controls, and support requirements. Require the substitution to be checked against the accessibility layout before purchase and rough in. A product described as accessible in marketing material does not prove it fits the complete room or the project code path.
During framing and rough in, measure from established finished references and document the centres before closure. Leave piping visible for required inspections. After finishes, verify that accessories, door hardware, dispensers, garbage bins, and movable furnishings have not occupied required clear areas. The final room is judged as an assembled space, not as separate trade packages.
For a commercial fit out, send Seal Plumbing the permit drawings, accessibility details, reflected wall elevations, fixture submittals, and construction schedule. The plumbing team can coordinate its installation with those documents. Final code interpretation and compliance confirmation remain with the authority and responsible project professionals.
Use a field checklist that protects the approved clearances
Before plumbing rough in, establish finished wall lines and floor elevation in the room. Mark fixture centres, partition faces, door swing, transfer space, turning area, and lavatory approach on the floor or framing. Compare those marks with the approved drawing and product dimensions. The physical layout often reveals conflicts that remain hidden when trades review separate sheets.
Before wall closure, verify drain and supply centres, carrier or support location, backing, valve access, insulation or pipe protection, and the path of every vent. Check that no pipe or cleanout occupies required knee or toe space. Photograph the work with measured references and keep the inspection stage visible as required.
Recheck the room after finishes and accessories arrive
Before fixture installation, recheck substitutions and finished build thickness. During installation, confirm fixture height and reach from the finished surface references used by the project. After accessories arrive, review grab bars, dispensers, mirrors, controls, garbage bins, and door hardware as one room. A late accessory can remove the very clear space that drove the rough in.
At closeout, the responsible project professional and authority determine compliance. Provide the plumbing test records, product information, concealed work photos, and accepted change documentation. That package lets the owner maintain the washroom without guessing where supports, valves, and piping sit behind the finished surfaces.
Questions for the fit out meeting
Who owns the accessibility code matrix? Which drawing establishes finished fixture centres and clear spaces? Are the fixture models approved, and have substitutions been reviewed? Where are backing, carriers, valves, cleanouts, and access panels shown? Answering these questions before framing gives every trade the same reference.
Also confirm the permit and inspection sequence, the person authorized to approve field changes, and the closeout evidence the owner needs. A plumber should not be asked to certify the complete room, and a designer should not assume plumbing can move freely after concrete, walls, and waterproofing are complete.
Send Seal Plumbing the current coordinated set rather than separate early sheets. Include architectural plans, wall elevations, accessibility details, plumbing drawings, fixture submittals, and the construction schedule. The team can then price and install a defined plumbing scope that supports the approved layout.
Protect the clearance through final fit out
Accessibility coordination succeeds when the finished clearances control the rough in and every later substitution is checked against them. Keep the plumbing centres, supports, service access, fixtures, accessories, and door operation on one coordinated view. The room must work as a whole after every trade is finished.
A change log is especially important in a fit out because several small substitutions can combine into one clearance problem. Record the original dimension, proposed change, affected fixture or approach, reviewer, decision, and drawing revision. Give the accepted change to every trade working in that wall or floor area. This keeps the plumber from following an obsolete centre while the partition installer or accessory supplier follows a newer detail. It also gives the owner a traceable record when the room is inspected, maintained, or altered later.
Carry the accessible layout into commercial rough in
Commercial rough in and fit out planning need to use the same approved fixture layout.
Ontario’s 2024 Building Code became effective on January 1, 2025. A commercial fit out must use the accessibility and plumbing provisions that apply to its permit. Ontario Building Code information for current projects.
Code aware next step for a commercial washroom
Send the approved fit out drawings, fixture schedule, accessibility details, and construction timeline. Seal Plumbing can coordinate the plumbing rough in with the documented layout.