
Water Filtration Installation: Where the Equipment Actually Goes
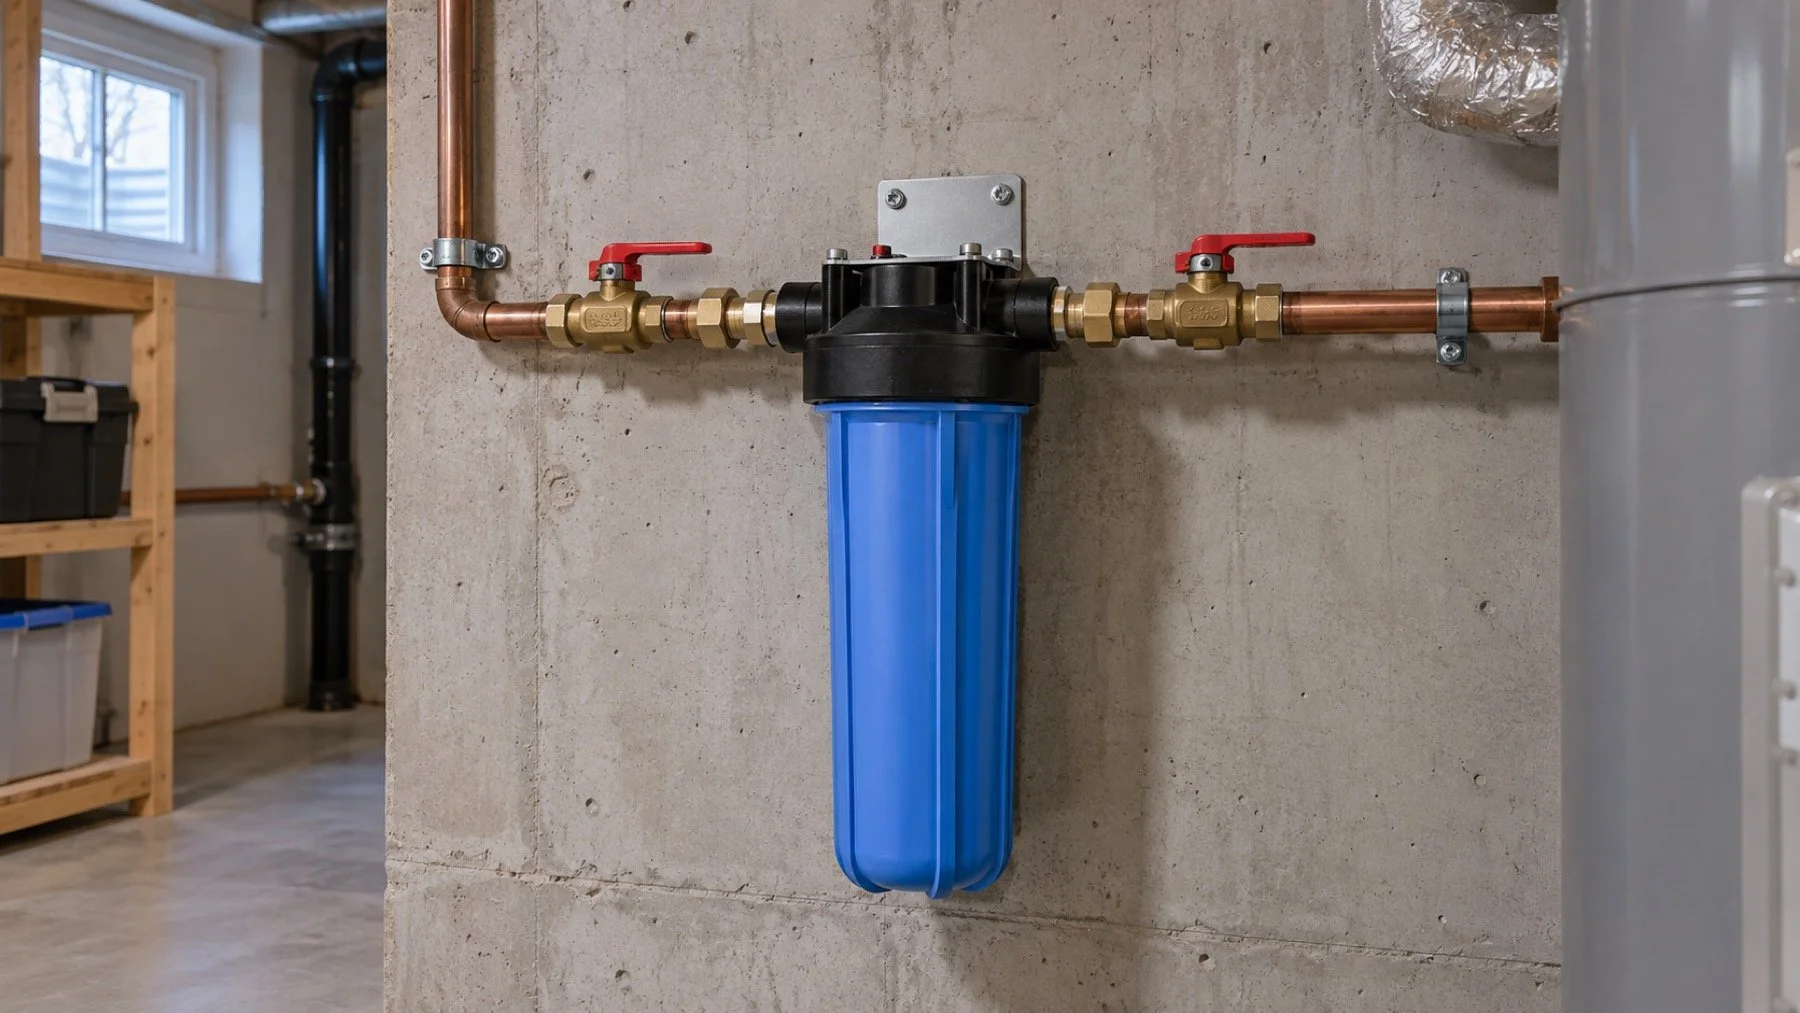
A whole home filter cannot simply go wherever there is an empty wall. It has to intercept the incoming main before the branches you want treated, while leaving room to isolate, drain, service, and eventually replace the equipment.
We plan the location from the water path outward. The meter, main shutoff, bypass, floor drain or other approved drain point, electrical needs, ceiling height, and service clearance all influence the final arrangement. Product dimensions belong in the plan before pipe is cut.
Whole home filtration goes on the main line after the meter and ahead of the branches, which means the install depends on drain access, service clearance around the unit and a reachable shutoff.This process narrative covers placement and plumbing scope. It does not choose treatment media or promise a water quality result without testing and a verified product specification.
Start with the water problem and the tested result
Sediment, taste, odour, hardness, and a specific contaminant are different problems. A cartridge that captures particles does not automatically address dissolved minerals or a health concern. Use a current water analysis and the manufacturer selection guidance to define what the equipment must do.
Municipal water and private well water need different questions. Keep the product decision separate from the placement decision, but settle both before installation. A large tank selected late can erase the service space shown on the drawing.
Trace the main from entry to the first branches
Locate the service entry, meter, main shutoff, pressure control, and early branch connections. A filter installed after a branch leaves that branch untreated. A filter installed where the shutoff or meter cannot be serviced creates another problem.
Photograph the route and label which branches serve outdoor taps, irrigation, kitchens, or equipment. The product instructions and water treatment plan determine whether any branch should bypass treatment.
Reserve drainage, clearance, and a safe floor area
Some systems need a drain connection for backwash or discharge. Others need only a housing that can be depressurized and opened. In both cases, the installer needs working room below, above, and around the unit. The floor should tolerate routine service without damaging finishes.
Do not place equipment where a filter housing blocks a panel, walkway, appliance service area, or emergency shutoff. Measure the replacement cartridge or tank movement, not only the installed body.
Build isolation and bypass into the arrangement
A bypass lets the home keep water while equipment is serviced, subject to the selected system design. Isolation valves let the installer release pressure and work without draining more piping than necessary. Valve handles and labels must remain visible after shelves or wall finishes are installed.
Older piping may need transition fittings or support changes. Those conditions should be assessed before the equipment arrives so the planned shutdown includes the real connection work.
Commission from the product instructions
After installation, the system needs flushing, leak checks, pressure checks, and any product specific startup. Record the model, media, cartridge, valve positions, and service interval from the verified manual. Do not replace those instructions with a generic calendar.
Leave the main shutoff and bypass reachable. A clear photo and simple valve diagram help the homeowner isolate the unit without guessing during future service.
Placement tests for a serviceable installation
Define what will be treated before choosing a wall
Whole home filtration is a plumbing location and a water treatment decision. Start with the water source, a current analysis when treatment claims depend on it, and the concern the owner wants addressed. Sediment, hardness, taste, odour, and a specific contaminant are not interchangeable. A system selected for one condition should not be described as solving another without verified product data and suitable testing.
Decide whether every branch should receive treated water. Outdoor taps, irrigation, humidifiers, kitchen drinking water, and specialty equipment may have different needs. Mapping those branches before the filter is placed can prevent unnecessary treatment or an accidental untreated fixture. Label the service entry, meter, main shutoff, pressure controls, and the first branch takeoffs on a simple drawing.
The equipment sheet must show connection size, orientation, maximum dimensions, operating requirements, drain needs, electrical needs, and service clearance. Use the replacement cartridge or media vessel dimensions as well as the installed size. A housing can fit neatly against a wall and still be impossible to open when the cartridge has to drop out below it.
Design the bypass for an ordinary service day
A serviceable arrangement lets the unit be isolated, depressurized, drained, and bypassed in the sequence allowed by the manufacturer. Valve handles need enough space to turn. Unions or other approved connections need working clearance. The floor and nearby finishes should tolerate the small amount of water that can escape during routine service. Shelving should not be planned across those access zones.
A bypass is not permission to ignore a failed unit. It is a way to maintain water service while the treatment equipment is serviced, where the design permits. Label normal, bypass, and closed positions clearly. If a branch must always remain untreated, show that permanent route separately so someone does not change it while trying to operate the service valves.
If the product backwashes or discharges water, the approved drain arrangement is part of the design. Confirm air gap, connection, capacity, and route requirements from the product and applicable plumbing rules. Do not run a loose tube to the nearest floor opening based on convenience. The discharge path needs to remain visible, supported, and protected from creating a new leak or cross connection risk.
Plan for pressure, shutdown, and future replacement
Any equipment on the main line adds fittings and can affect flow. The installer should know the existing service size, incoming pressure, household demand, and product pressure drop before final selection. A filter that performs well at one flow can feel restrictive when several fixtures operate together. The product data and the plumbing assessment have to agree on the intended service condition.
Schedule the shutdown only after older valves and piping have been inspected. A main shutoff that does not fully close, corroded transitions, limited meter access, or unsupported piping can expand the work. Identifying those conditions early lets the quote describe them and keeps the installation day from becoming an improvised repair around new equipment.
At turnover, flush and commission the system exactly as the verified instructions require. Record the installed model, filter or media type, valve positions, startup readings, and the maintenance method. Leave enough information for the next replacement without making a generic lifespan promise. Water use and incoming conditions vary, so the product instructions and observed performance should guide service.
Walk through one future filter change before approving the location
Imagine the system is due for service and the housing is full of water. The technician needs to close the correct valves, release pressure, place a container, remove the housing or media, clean the sealing surfaces, install the specified replacement, reopen the valves, flush, and check for leaks. If a shelf, wall, appliance, or low ceiling blocks any step, the location is not ready.
Check what happens to the house during that service. Decide which fixtures lose water, which branches remain untreated, where drained water goes, and whether the owner can reach the main shutoff. Make sure replacement parts can enter and leave the room without being tipped through a narrow finished opening. This review catches access problems that a dimensioned equipment rectangle can miss.
Finally, plan for the eventual removal of the complete unit. Treatment products change, and the next system may not share the same connections. A tidy installation leaves sound pipe, clear isolation, and workable space around the main. It should not trap the water meter, regulator, electrical panel, or another appliance behind a product that will need regular service.
Information that makes the placement review useful
Send a photo from the water service entry to the first branches, plus close views of the meter, main shutoff, pressure control, nearby drain, outlets, and available wall. Include room dimensions and the exact product data. If treatment is based on water quality, include the current test and the supplier recommendation instead of only a product name.
Tell the plumber about planned shelving, finished walls, appliances, or storage that will share the room. Those later additions can remove service clearance even when the pipe connections fit today. Reviewing the whole utility area protects access to the filter and to the existing shutoffs and equipment around it.
Make the final location easy to service
A good filtration location remains easy to understand after the installer leaves. The main shutoff, bypass, normal flow direction, drain connection, replacement space, and service valves should be visible and labelled. That clarity matters during routine maintenance and during any future plumbing shutdown.
Place treatment within the whole home plumbing plan
Whole home treatment affects the main line, routine service, and future repair access.
Ontario's 2024 Building Code took effect on January 1, 2025, so a new main line filtration installation should be assessed against the code version that applies to the project. Ontario's Building Code.
Code aware next step for filtration placement
Send the water test, product data, main line photos, and room dimensions. Seal Plumbing can plan the plumbing connections and service access for the selected system.