
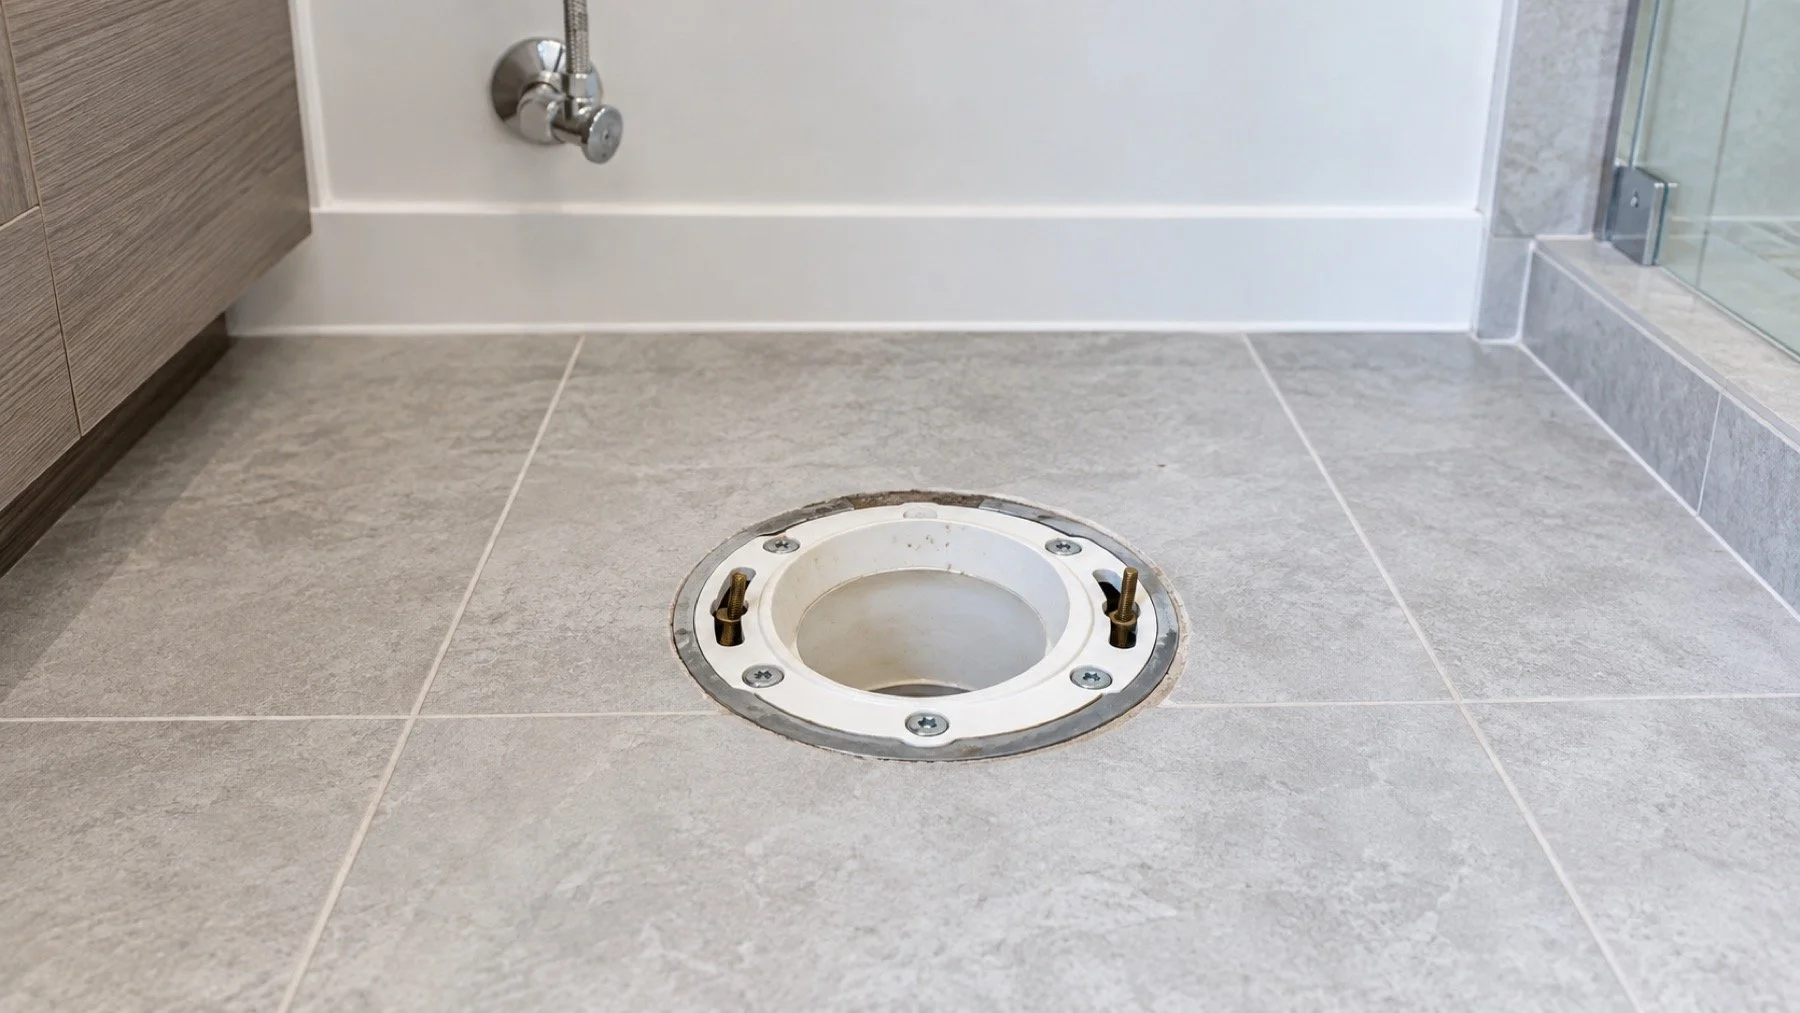
A toilet that rocks should not be tightened harder until someone checks what is moving. The bowl may be uneven on the tile, but the flange below it may also be cracked, loose, corroded, or sitting at the wrong height after a floor change.
A toilet that rocks or smells is often sitting on a flange that has broken or ended up below the finished floor, and tightening the bolts hides that condition instead of correcting it.We remove the toilet and inspect the flange, fasteners, finished floor, drain connection, and surrounding material as one assembly. A new wax seal cannot stabilize a broken mounting point. Shims can level a sound installation, but they cannot repair a flange that no longer holds the toilet securely.
This failure catalogue stays focused on flange conditions so it does not duplicate Seal Plumbing articles about general toilet installation or bathroom odours.
Failure pattern one: the flange is loose at the floor
The toilet can move when the flange is not secured to sound material. Fasteners may have loosened, missed framing or backing, or lost purchase in damaged subfloor. Tightening closet bolts transfers more force to the flange without restoring its attachment.
Inspect the floor for movement and staining. The repair scope may include sound backing or floor work before the flange can be secured properly.
Failure pattern two: the ring is cracked or corroded
Metal rings can corrode and plastic components can crack, especially around bolt slots. The damage may let one side of the bowl lift even when the other bolt feels tight. A repair ring or replacement flange must suit the existing pipe material and condition.
Do not stack hardware to bridge missing material. The plumber needs a clean view of the connection and enough sound pipe to make an approved repair.
Failure pattern three: the flange finished below the new tile
A renovation can raise the finished floor while leaving the original flange low. A thick or doubled wax seal may appear to fill the gap, but it does not correct a loose flange or poor alignment. The correct approach depends on the measured height and the condition below.
Bring the tile and underlayment thickness into the rough in plan before flooring starts. That gives the installer a finished elevation instead of a late surprise.
Failure pattern four: the bowl is uneven but the flange is sound
Large format tile, high grout joints, or a small floor variation can leave the bowl bearing on a few points. The toilet may need careful levelling and approved shimming after the flange and seal are confirmed sound.
The bowl should sit stable without using the bolts to bend it toward the floor. Over tightening can damage porcelain or the flange.
Reset, test, and watch the surrounding floor
After the repair, the toilet needs a new compatible seal, even tightening, repeated flush testing, and a stability check. Inspect the supply connection and shutoff at the same time because moving the toilet can disturb older parts.
If the subfloor is soft, stained, or swollen, the project may need additional repair outside the plumbing scope. Correct that substrate before treating the toilet reset as complete.
Inspect the connection from bowl to floor
Read the movement before removing the bowl
Watch where the toilet moves. If the whole bowl shifts at the floor, the mounting or floor contact needs inspection. If the seat moves but the base stays still, the seat hardware may be the problem. If the tank moves separately, its connection to the bowl needs attention. This simple observation prevents a flange repair from being assumed before the toilet comes up.
Look for staining, soft flooring, cracked caulk, odour, or moisture after flushing. Note whether the rocking began after new tile, a toilet replacement, or a leak. Do not keep tightening the closet bolts. Excess force can crack porcelain, distort hardware, or damage a weakened flange without making the floor or drain connection sound.
Shutoff condition is part of the visit. An old valve may not close fully, and moving the toilet can disturb the supply connector. Photograph both before work. If active leakage is present, stop using the fixture and protect the area. The plumber can then plan isolation, removal, and any additional supply repair in the same scope.
Match the repair to the pipe and floor condition
After the bowl is removed, clean the connection enough to see the flange ring, body, bolt slots, fasteners, pipe material, and finished floor relationship. A cracked ring, corroded metal, loose fasteners, broken plastic, or a flange set too low each calls for a different repair. A repair ring is not automatically suitable for every damaged body.
The flange should be anchored to sound material and positioned for the completed floor and selected toilet. If the subfloor is soft or missing around the opening, plumbing hardware cannot restore the structure. Coordinate the floor repair first, then secure the flange using an approved method for the existing pipe and assembly.
A raised tile floor can leave an older flange below the intended relationship to the finish. Measure the actual difference. Do not solve every height problem by stacking seals. The plumber should choose an approved extender, repair, or replacement arrangement based on the flange condition, pipe material, available access, and product instructions.
Reset the toilet without using the bolts as clamps
Dry set or measure as needed to confirm the bowl can sit evenly on the finished floor. If the flange and floor are sound but the surface varies slightly, approved shims can support the toilet at stable points. The closet bolts secure the bowl to the flange. They should not bend the base down across an uneven tile surface.
Install a compatible new seal and lower the toilet without dragging it across the connection. Tighten evenly and cautiously. Reconnect the supply, open the shutoff, and test repeated flushes while inspecting the base, valve, connector, and tank connections. Then check stability from several directions before final finishing around the base.
Explain what was found after removal. Keep photos of the original flange, the repair, and the finished reset. If water damage or an uneven substrate required another trade, record that boundary. A stable bowl, dry tests, a sound mounting point, and clear repair documentation provide a stronger result than simply replacing the wax seal and hiding the same movement.
Know what can expand the repair after removal
The toilet hides the flange, seal, fasteners, drain opening, and a section of finished floor. Until it is lifted, the plumber cannot fully see corrosion, cracks, missing support, old repair parts, or moisture damage. A quote should explain that visible conditions set the base scope and that concealed floor or pipe damage may require a revised plan.
Access below can change the options. An open basement ceiling, a finished ceiling, a slab, or a shallow floor assembly each affects how the existing pipe and flange can be reached. Share photos from the room below and any renovation history. If the floor was raised, identify the layers and approximate date so the plumber knows why the flange height may no longer suit the finish.
Keep the removed toilet protected if it will be reused. Inspect the bowl base, bolt holes, tank connection, and supply components before committing to reset it. A sound flange repair cannot correct cracked porcelain or a damaged toilet base. Make the reuse decision while the fixture is off and the full assembly is visible.
A useful scope for the appointment
Send a short video showing where the toilet moves, photos of the base and supply shutoff, and notes about recent flooring or toilet work. Mention odour, staining, seepage, soft floor, or changes in the room below. Stop using the toilet if water appears at the base or the movement is getting worse.
The appointment should allow time to isolate the water, remove the bowl, inspect the concealed connection, explain any floor or pipe damage, complete the approved flange work, reset and test the toilet, and document the result. That sequence is more reliable than arriving with a single assumed part and no plan for what the bowl may be hiding.
Confirm every layer of the reset
A flange repair is complete when the mounting point is sound, the floor supports the bowl, the seal suits the assembly, the water connections stay dry, and the toilet remains stable through repeated use. Each check addresses a different part of the connection hidden beneath the fixture.
If the toilet has leaked, inspect beyond the visible ring at the base. Water can travel under flooring or into the room below before it appears. The plumber can identify moisture and damage seen during removal, but drying, finish replacement, mold assessment, or structural repair may require another qualified scope. Photograph the exposed area and agree on who confirms that supporting material is ready before the flange and bowl are reset. Closing over unresolved soft or wet material can repeat the movement and conceal a larger repair.
Connect the flange repair with the bathroom assembly
The flange, toilet, odour history, floor finish, and repair access should be reviewed together.
Ontario brought the 2024 Building Code into effect on January 1, 2025. That code context becomes relevant when a flange repair expands into a permitted bathroom alteration. Ontario Building Code overview for alterations.
Code aware next step for a rocking toilet
Send a short video of the movement and photos of the finished floor and shutoff. Seal Plumbing can remove the toilet, inspect the flange condition, and define the appropriate repair.