
Hot Water Recirculation: The Line to Decide Before the Walls Close
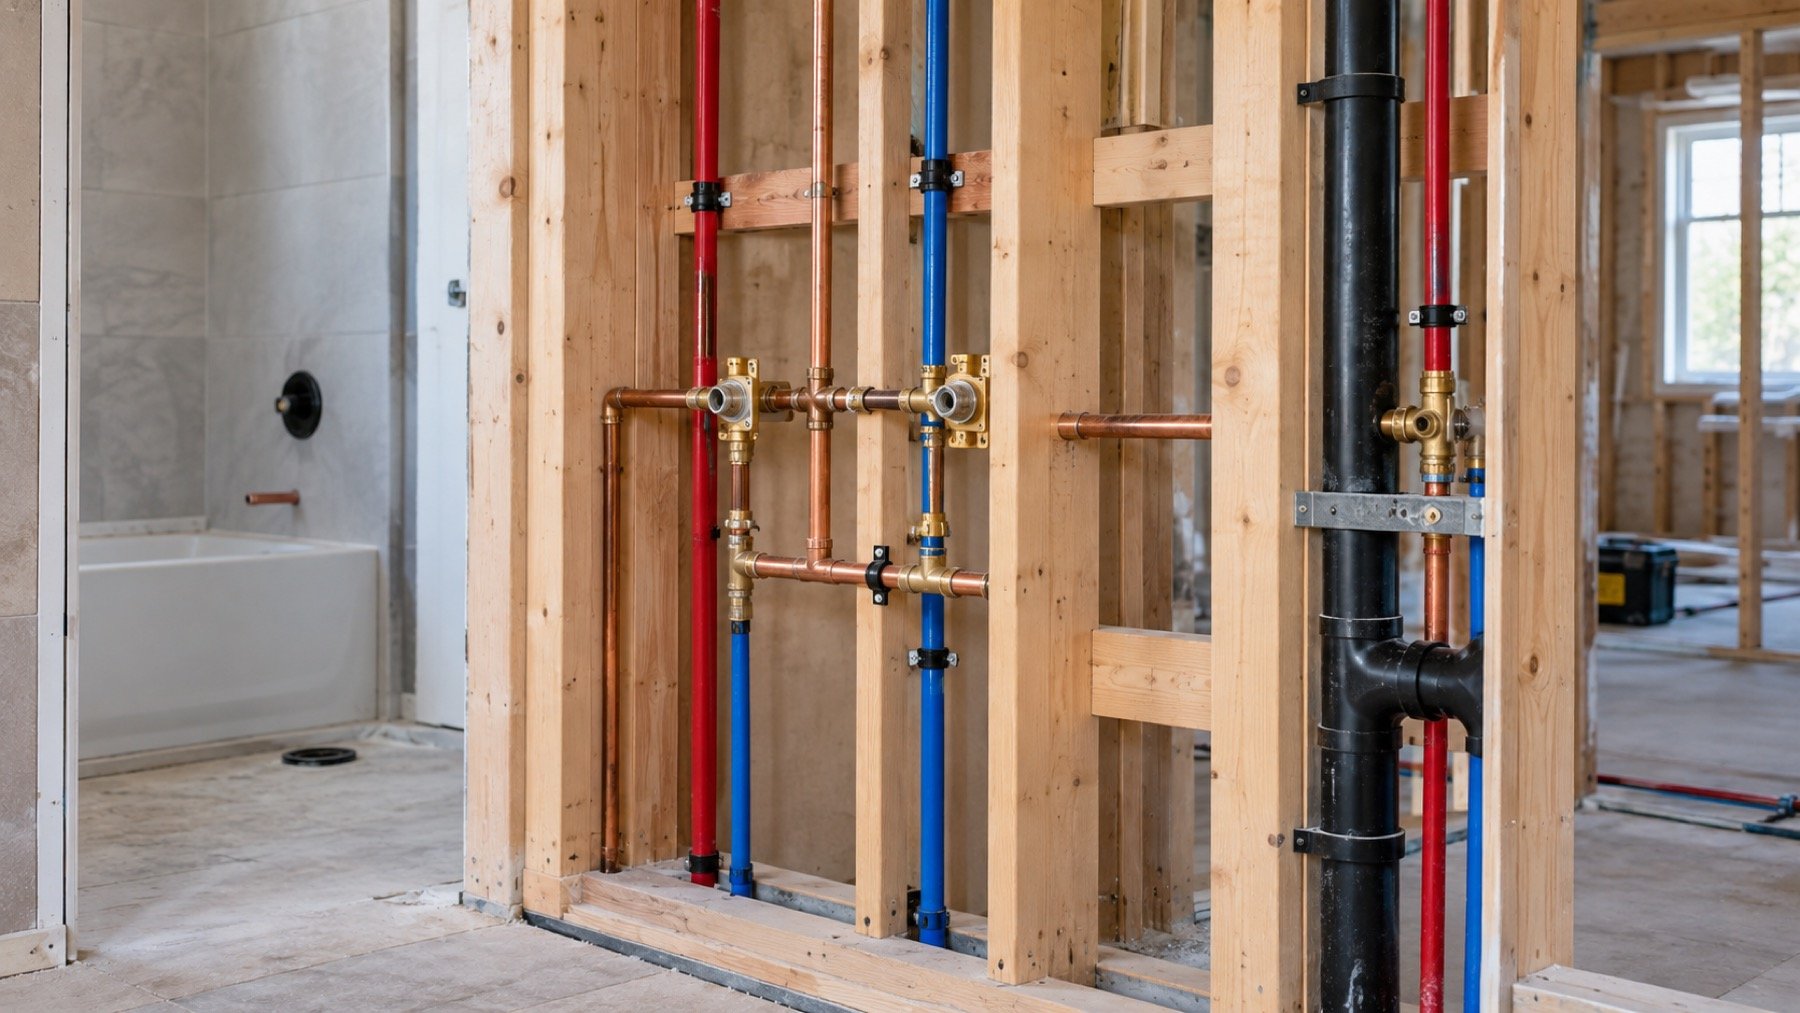
The shower is at one end of the house and the water heater is at the other. If you want hot water to arrive with less waiting, the important decision is not the pump brand. It is whether the renovation will include a dedicated return path from the farthest fixture.
If the design uses a dedicated return line, it is far easier to install while walls are open. The heater supplier and plumber should confirm whether that layout or another approved demand system fits the house.We want that decision made while the walls and ceilings are open. A return line has to travel through the same framing that carries drains, vents, ducts, wiring, and structure. Once drywall and finishes close the route, adding it can mean selective demolition or accepting a different system design.
This chronological checklist follows the decision from drawings through commissioning without assuming that Seal Plumbing installs or services the water heater itself.
The recirculation rough in sequence
Map the long wait before framing begins
Mark the heater location, the farthest fixture, and the likely supply route on the plan. The longest branch is usually the best place to study first because that volume of cooled water creates the wait. A large house may have more than one distant branch, so one return point does not automatically improve every fixture.
Confirm which bathrooms, kitchens, or bars actually need faster hot water. A clear priority keeps the design tied to daily use instead of turning every branch into extra piping.
Choose the return concept with the mechanical plan open
A dedicated return provides a defined loop. Some retrofit products use the cold line as a temporary return, but that changes how the system behaves and should not be treated as the same arrangement. The selected equipment, controls, check valves, and balancing method must suit the complete plumbing system.
The water heater connection and manufacturer requirements also matter. Because water heater work is not listed as a Seal Plumbing service, coordinate that portion with the appropriate supplier or trade and give the plumber the approved connection information.
Reserve a route before other trades fill the cavities
The return needs a continuous path through joists, studs, and service spaces. Drains need slope, vents need their own route, and structural members limit drilling. A line that looks easy on a reflected plan may conflict with a beam, stair, duct, or tiled wall when the framing is real.
Walk the route with the plumbing drawings and the framing visible. Decide where the line can be supported, insulated, isolated from sharp edges, and accessed at valves. That walk is much cheaper than redesigning behind finished millwork.
Set controls around use, not constant circulation
A recirculation pump can be controlled by a timer, temperature, occupancy signal, or demand button depending on the selected system. The control choice affects when the loop runs and where wiring or low voltage controls need to land. It also affects what the homeowner must understand after turnover.
Natural Resources Canada discusses demand type hot water recirculation as an option for a distant point of use. Use the selected product instructions and the project mechanical design to settle the final control strategy.
Pressure test, insulate, and document before closure
The loop must be tested with the rest of the supply work before walls close. Check joints, valve direction, supports, and the intended return connection. Photograph the route with measurements from fixed framing points so future work does not depend on memory.
Confirm insulation and access requirements before the inspection and drywall sequence. At commissioning, verify that the far fixture draws from the loop as intended and that nearby cold fixtures behave normally.
Calculate the wait from pipe volume and route, not from frustration
The wait at a fixture comes from the cooled water sitting between that fixture and the heater. A long route, a large pipe, or several branches can increase the volume that must leave before hot water arrives. Measure the real run on the drawings and confirm it in the framing. The farthest bathroom may be the obvious complaint, but a branch serving a kitchen or bar can create a separate wait that one return point will not solve.
List the fixtures where quicker delivery matters and the times they are used. That information helps the designer decide whether a full loop, a demand control, or a more limited arrangement fits the house. It also prevents a pump from circulating through more piping than the household needs. The goal is not constant motion. The goal is a planned path that provides useful service without turning the rough in into an uncontrolled network.
Before equipment is ordered, verify the water heater type, approved connections, minimum flow conditions, and manufacturer limits. Some heaters and controls respond differently when a loop changes return temperature or flow. Seal Plumbing can plan the plumbing route, but the heater supplier and any other required trade must confirm the selected equipment and its connection details.
Give the return line a real place in the framing plan
A return line competes with drains, vents, ducts, wiring, blocking, and structural members. The most direct line on paper may cross a beam or a tiled ceiling that cannot be opened later. Walk the route after framing and before the walls close. Mark each penetration, support point, isolation valve, and change in direction. If the line passes through an unconditioned area, confirm how the project will protect and insulate it.
Access matters at both ends. The mechanical room needs room for the pump, check valve, isolation, service connections, and controls specified for the system. The remote end needs a defined tie in that remains understandable after cabinetry and fixtures arrive. Photograph the complete route with a tape measure held to fixed framing points. Those records are useful when someone mounts a cabinet, mirror, or grab bar years later.
Once board, tile, and millwork cover the route, adding a dedicated return may require opening completed work. The drawing review, framing walk, and pressure test belong before that point. A decision made while the cavities are visible protects both the route and the finished rooms below it.
Commission the loop as an operating system
A pressure test proves the new piping holds. It does not prove that the completed loop delivers useful hot water or that the controls behave properly. At startup, confirm valve direction, purge trapped air as directed, verify the pump setting, and observe the far fixture. Then check nearby cold fixtures for unwanted warming. Record the starting conditions so later adjustments have a reference.
Control choices should follow the household routine and product instructions. A timer can limit circulation to predictable periods. A demand control starts a cycle when someone requests it. Temperature controls respond to the loop condition. Each option affects wiring, user behaviour, and energy use. Natural Resources Canada discusses demand type recirculation for distant points of use, which is different from leaving a pump running without a defined schedule.
Leave the owner with a simple diagram showing the pump, valves, return line, and control. Include the model information and the maintenance steps from the manufacturer. A useful turnover also explains what a normal cycle sounds like, which fixtures the loop serves, and who to call if hot water begins appearing in the cold line or the delivery time changes.
Decide what success will look like before startup
Write a practical acceptance test before the walls close. Choose the distant fixtures the loop is meant to serve, note the starting water condition, and define how the control will be activated. At commissioning, observe delivery at those points and compare the result with fixtures outside the loop. This keeps the final check tied to the design intent rather than to a vague impression that hot water feels faster.
The homeowner also needs to know which conditions can change performance. A disabled timer, a closed isolation valve, air after service, a control setting, or work at the heater can alter the loop. Label the important parts and keep the final drawing with the equipment records. A clear handoff gives future technicians the same route and control logic the renovation team approved.
Finish the loop plan before finishes begin
Before the final walkthrough, compare the installed route with the drawing and note any field changes. Photograph the installed valve and control labels, then give the owner the same version the trades used for commissioning. That record makes later service safer and helps distinguish a control setting from a piping fault if delivery changes.
Treat the return loop as part of the house plumbing design, not as an accessory selected after rough in. The route, heater interface, controls, insulation, balancing, and owner instructions all affect the result. Closing each of those decisions before finish work protects the renovation from avoidable rework.
Coordinate the loop with the renovation drawings
Use the project pages below to coordinate supply routing with custom residential and kitchen work.
Natural Resources Canada identifies a demand type hot water recirculation system as an option when a point of use is 9 m, or 30 ft, or more from the water heater. Natural Resources Canada hot water guidance.
Code aware next step before the walls close
Send the floor plan, heater location, fixture schedule, and framing status. Seal Plumbing can review the plumbing route and rough in scope for a GTA renovation.